Grid AI Guide
Space Engineers: Automatons define a new era in automation. This guide provides both comprehensive detail of each of the AI blocks as well as examples of use.
Block Types
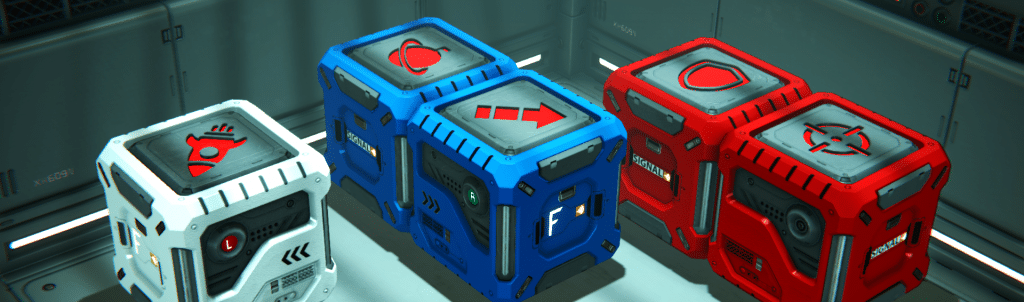
There are three different types of AI blocks: Move, Task, and Combat. They can be recognized by their name and have a correlating icon in their preview image. These blocks work together to allow your grid to perform complex behaviors.
Only one block of each type can be active at any time. This allows you to easily switch (either manually or through actions) between different behaviors.
 Move type
A Move block executes movement instructions provided by other blocks. It will use the grid’s available thrusters and gyros to move the grid toward waypoints. A Move block allows you to set movement parameters and restrictions, such as how fast the grid should travel and whether it should avoid collisions.
 Task type
A Task block allows you to set up various non-combat tasks for your grid. Using task blocks, you can make your grid follow an exact path, patrol an area, follow a player, and more.
 Combat type
A (Combat) block will take priority over the active (Task) block when it detects an enemy within 2500m. It will provide instructions to the (Move) block to execute maneuvers. Additionally, it can target, lock and use available weapons to engage the enemy. When no enemies are nearby, the (Combat) block will stop providing instructions and a (Task) block can take over operation.
Collision Avoidance
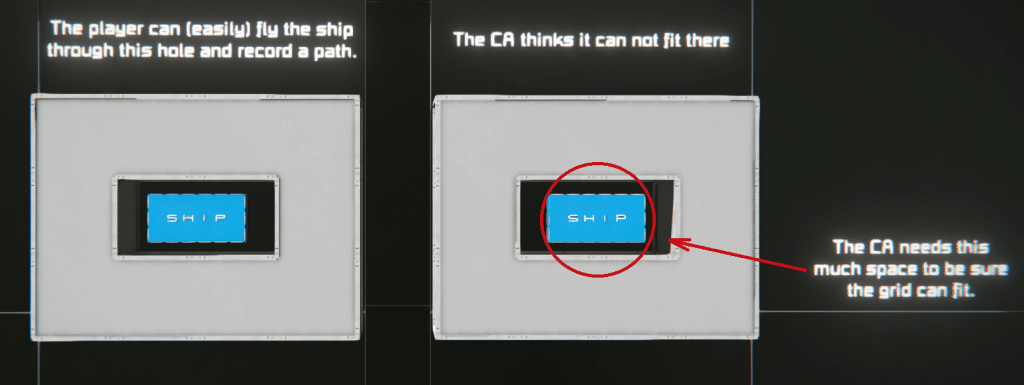
When the player records a path, the grid will attempt to follow the path exactly, so long as Collision Avoidance (CA) is disabled.
When Collision Avoidance (CA) is enabled, it will not attempt to follow a path exactly if any objects obstruct its path.
AI BLOCKS
AI Flight (Move)
Designed for flight control in both space and atmosphere.
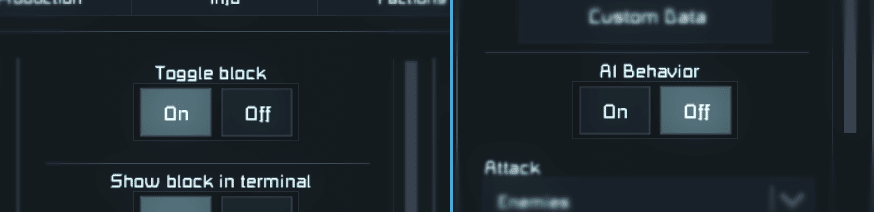
- AI Behavior: On/off – Enables or disables this blocks AI behavior.
- Collision Avoidance: On/off – Determines if the AI will attempt to avoid collisions.
- Precision Mode: On/off – Precision Mode ensures the grid will reach the exact waypoint or GPS location. This forces the grid to fully rotate towards the next waypoint before it can accelerate. For most builds, precision is not necessary and this should be disabled.
- Speed Limit: Configurable from 0 to 100 m/s.
- Min. Altitude: The minimum altitude that the grid will fly at.
- Align to P-Gravity: If checked, the grid will align to planetary gravity. The alignment will be determined by the orientation of the “Flight” block.
- Max Pitch Angle: When flying in gravity, maximum pitch up/down.
- Max Roll Angle: When flying in gravity, maximum roll left/right.
Operation – When this AI block is enabled, the Autopilot will be in control. This is indicated by the “Autopilot Enabled” notification on the hud. If you want to manually fly your grid, disable AI behavior.
Operation – When Collision Avoidance is enabled and a drone is unable to find a reliable path to the waypoint, it will move to the next waypoint. When there are no other waypoints, it will stop.
Operation – When your drone should follow an exact path, enable Precision Mode and keep the Speed Limit quite low. Conversely, when precision is less important you may want to increase the Speed Limit and disable Precision Mode.
AI Basic (Task)
An extended version of the Remote Control block that provides complex behaviors as well as the original “basic” behaviors.
- AI Behavior: On/off – Enables or disables this blocks AI behavior.
- Select Objective: Currently offers three options (Follow Player, Follow Home, Autopilot) each option is described in more detail below.
- Follow Player
- You may toggle this behavior with “Follow Me” and “Stop Following”.
- Additionally, you may define the following distance via a slider anywhere from 1 to 500 meters.
- Follow Home
- You can define a GPS point or Beacon that the grid will follow.
- Set Current Position as the Home location via a simple button.
- You can set the grid to “Wander While Idle”. This behavior takes place when the grid has reached its minimum range from home.
- Both the minimum and maximum wander distance can be adjusted via sliders ranging from 0 to 2500m.
- Autopilot
- Allows the grid to pilot to a GPS point via “One Way”. Alternatively it can be set to Patrol or Circle between two or more GPS points.
- All available GPS points are displayed in the “GPS Locations” menu. You can then select from these GPS locations and add them, as desired, to the “Waypoints” menu.
- Additionally, you can choose to trigger an action when reaching a waypoint via the “Setup Action” button.
- Follow Player
- Set Grid Position and Set Player Position: Creates a GPS at the current position and sets it as the Home location.
This allows a grid to automatically perform its actions in a new area or region, such as setting the position and then going on patrol.
Operation – The drone will be considered to have reached “Home” when it is within the Minimum and Maximum range. When your Home moves (i.e. Home is a beacon on a ship, and the ship moves closer to the drone), the drone will stay still (or wander) until the distance from Home is less than the Min distance. Once this threshold is crossed, the drone will move away until it is once again within the Min and Max distance.
Operation – A drone set to Follow Player will move towards the player until it has reached the Follow Distance. When the player moves closer to the drone, the drone will stay still. When the player moves away from the drone, the drone will start moving toward the player until it reaches the Follow Distance.
AI Recorder (Task)
A path flight recorder. Used to log and follow a selection of waypoints, or record and replay Hotbar actions.
- AI Behavior: On/off – Enables or disables this blocks AI behavior.
- Play/Stop: Begins pathing to waypoints from the top of the list down and enables the AI behavior.
- Repeat: Repeats the entire sequence of waypoints.
- Waypoints: All available GPS points are displayed in the “GPS Locations” menu. You can then select from these GPS locations and add them, as desired, to the “Waypoints” menu.
- Additionally, you can choose to trigger an action when reaching a waypoint via the “Setup Action” button.
- Show path on HUD: On/off – Displays the recorded path on the HUD. To see this, you must enable “Show on HUD” on this block and enable “Show AI function” in the info screen. You must also have an Antenna on this grid.
- Show Selected Points: On/off – Displays the selected waypoint(s) on the HUD. Also requires “Show on HUD” on this block, “Show AI function” in the info screen, and an Antenna.
- Record/Stop – Enables the recording function. Waypoints will be recorded based on the “interval” and “distance” selected.
- Record Interval – The minimum time between waypoint generation.
- Minimal Distance – The minimum distance traveled before a waypoint is automatically generated.
- Reference Beacon: If no reference is set, all waypoints generated are relative to the world, if a reference is set, all waypoints generated are relative to that point. This is a powerful feature. A brief example to help better illustrate its value is included below.
- No reference point – The drone could fly from one asteroid to another. It navigates by world GPS and uses the center of the star system as its reference.
- Reference set – The drone could fly around a moving ship, using the ship itself as its reference.
- Record Action: When you press a hotbar action while recording, it automatically adds a waypoint at that location with the action tied to it. When you play the recording, the action automatically gets triggered when the waypoint is reached
Operation – When playing a path with Collision Avoidance (CA) enabled, your drone will try to evade other grids in its path.
- Note that with CA disabled, your drone will strictly follow the path and will not stop for anything! Ensure that the path is clear.
- You can record switching CA on/off in the path itself.
Operation – The AI Recorder (Task) will save not only waypoints but also vessel orientation. This orientation is based on the orientation of the AI Recorder (Task).
Operation – When the orientation of your drone is important, it is best to space out your waypoints and make gradual turns.
Operation – When copying and pasting blueprints that have path recorders using reference beacons, you will need to re-select the reference beacons to make them work properly. The AI Task: Recorder does not remember them on its own.
AI Defensive (Combat)
Allows for the easy automation of defensive behavior such as fleeing combat or returning fire.
- AI Behavior: On/off – Enables or disables this blocks AI behavior.
- Defend Against: Determines what will trigger defensive behavior. You can select either enemies or enemies and neutrals.
- With Subsystem: Grids with the selected subsystems will be considered a “threat” and reacted to.
- You may select from Thrusters, Power, and Weapons.
- In Example: If you have selected “Weapons” as the subsystem then only enemy grids with “Weapons” will be considered a threat.
- Lock Target: Target lock grids that meet the “Defend Against” and “With Subsystem” condition.
- Flee Trigger: Determine what will cause your grid to flee back to a waypoint. Taking damage, being target locked, or never/always flee from combat.
- Flee Destination
- Away from Target – Flee in a random direction, opposite from the threat
- Flee distance – Flee up to this distance from the last known location of the threat.
- Random Deviations Angle – The AI will use course deviations while fleeing to make it hard to track.
- Random Deviations Interval – How often the AI will do Random Deviations.
- To GPS / Beacon – The drone will travel to the selected GPS / Beacon coordinates.
- Flee To: Select a waypoint to return to when the flee action is triggered.
- Flee waypoint size: The grid must arrive at or within this waypoint. The waypoint can be resized via a slider from 0 to 500m.
- Away from Target – Flee in a random direction, opposite from the threat
- Evasive maneuvers checkbox – The AI will attempt to avoid incoming projectiles while fleeing.
Operation – When an enemy is within 2500m a Combat block will take over from a Task block, and will only revert back to a Task block when no enemies are nearby.
Operation – Until a targeted grid is destroyed, out of range, or no longer powered/targetable, the Defensive block will continue to stay active. It can, of course, be manually disabled by simply turning off its AI Behavior.
AI Offensive (Combat)
Determines targeting behavior, attack pattern, and overall offensive strategy.
- AI Behavior: On/off – Enables or disables this blocks AI behavior.
- Target Priority: Choose what to target based on three options, Closest, Largest, and Smallest.
- Update Every: Determines how often the target priority is checked and when another target can be locked. Very low settings will result in either a failure to lock any target or erratic targeting.
- Threatening Subsystem: Grids with the selected subsystems will be considered a “threat” and reacted to.
- You may select from Thrusters, Power, and Weapons.
- In Example: If you have selected “Weapons” as the subsystem then only enemy grids with “Weapons” will be considered a threat.
- Attack Pattern: What combat flight pattern the AI will take during battle.
- Circle/Orbit – Can be provided with a target range to circle/orbit at.
- Circle Distance – The distance to the target at which the drone will circle/orbit.
- Circle in P-Gravity – When toggled, the drone will circle around the target rather than orbit around it while the engagement takes place on a planet.
- Facing Mode – Select either “Use static weapons” or “Manual facing priority”
- Static Weapons – Select the weapons you want to use from the list of available weapons.
- Facing Priority – Select from Front, Backward, Left, Right, Up, Down.
- These directions determine which side(s) the drone will point toward the target. For example: when Right and Left are selected, the drone will keep either of these sides facing the target.
- Stay At Range – Can be provided with both minimum and maximum range.
- Minimal /Maximal Distance – The drone will keep between these distances when plotting a path relative to the target.
- Evasive Maneuvers -When toggled, the drone will vary its course to make it harder to be hit by enemy fire.
- Facing Mode – Select either “Use static weapons” or “Manual facing priority”
- Static Weapons – Select the weapons you want to use from the list of available weapons.
- Facing priority – Select from Front, Backward, Left, Right, Up, Down.
- These directions determine which side(s) the drone will point toward the target. For example: when Right and Left are selected, the drone will keep either of these sides facing the target.
- Hit and Run – An advanced attack strategy allowing the AI to guide a customized strike and immediately retreat on execution. Most aspects, including what weapons are used, can be customized.
- Break-off distance – The distance from the target at which point the attack run will break off and retreat will begin.
- Retreat distance – The distance from the target the drone will retreat to. When this distance is reached, another attack run will be started.
- Retreat Timeout – In case the retreat takes longer than this time, a new attack run will begin regardless of whether the retreat distance is met.
- Retreat angle – The angle of the retreat direction relative to the attack run direction.
- Pass over target – In case the battle takes place on a planet, this setting will force the retreat angle to never go “below” the target (relative to gravity).
- Available Weapons – Select from the available static weapons list and add or remove items from “Selected Weapons”.
- Selected Weapons – These are the weapons that will be used during the “Hit and Run” combat sequence. The first weapon on the list will be used as the aiming reference for the purposes of leading moving targets.

- Intercept – Able to plot and execute an intercept course. Guidance type, as well as the ability to override collision avoidance, is available.
- Guidance Type – Basic, Target Prediction
- Basic: The drone will attempt to reach the current location of the target.
- Target prediction: The drone will attempt to reach the predicted intercept point. It will “lead” the target.
- Override Collision Avoidance – This can be toggled on/off and is an ideal setting for a missile or tracking projectile.
- Guidance Type – Basic, Target Prediction
- Circle/Orbit – Can be provided with a target range to circle/orbit at.
Operation – Ensure that all static weapons you want to use are facing in the forward direction. Additionally, when your drone has multiple kinds of forward-facing weapons, accuracy against moving targets may be reduced.
Operation – For the Hit and Run pattern, you will want your break-off distance to be larger than the stopping distance of your grid. For example, if your grid takes 300m to come to a full stop, you should ideally put your break-off distance at, say, 400m.
A shorter break-off distance can work, but then you are relying on collision avoidance to do evasive maneuvers which may not always be possible.
EVENT CONTROLLER
The Event Controller can monitor various block states and trigger toolbar Actions when those values change. This can be used in conjunction with other automation blocks to create logic systems on grids.
- Select Actions: This determines what actions the block will execute when the Event is triggered, and any relevant conditions are met.
- Event: The event tracks whether or not a specific requisite has taken place. For instance, if a landing gear is in the locked state, cargo is full to capacity, or power output is below or above a certain threshold. When these conditions are met, the Event Controller will then trigger whatever actions have been set for it.
- Condition: Not all blocks will have a condition. For instance, a cargo container could have a condition of being “equal to or greater than” 50% full. Other events, like whether or not a landing gear is locked, will have no condition.
- Available Blocks: Select from the list of available blocks and add or remove items from “Selected Blocks”.
- Selected Blocks: These are the blocks that will be monitored for an event or condition that has been defined by the options above.
- AND Gate
- When enabled, actions only trigger when all monitored blocks fulfill the condition.
- If AND Gate is disabled, the event controller functions like an OR gate and the false condition only triggers when none of the inputs are true.
BEST PRACTICES
Default Disabled: All blocks should start disabled. When making tweaks or modifying settings, ensure that the block is disabled and that it is not trying to perform a behavior or action.
Operation: Adjusting settings on runtime is possible and may be desired for advanced functionality, but can also result in accidental/unexpected behavior when you’re not careful. It is generally advised to switch all AI behaviors OFF before you make changes to settings!
Error Messages: AI blocks may provide a status message or error message depending on context. You can find this message in the lower right of the block menu.

Block Type: Only a single block of a given type (Move, Task, Combat) can be active at any time. For instance, you cannot have both an offensive and defensive block active at the same time. You can, however, have a task block, combat block, and move block all active at the same time.
- AI Move – Flight
- AI Task – Recorder, AI Task – Basic
- AI Combat – Offensive, AI Combat – Defensive
Pro Tip: You may find the event controller extremely handy for exploring complex behavior that changes based on the environment or situation.
Remote Access: When working on an AI grid (especially small grid builds that may not have a cockpit) we strongly recommend adding a Remote Control to the configuration. A Remote Control will allow you to easily access the grid and take control, even at great distances.
Easy Remote setup
- Enable your engineer’s antenna.

- Add an antenna to the grid. The range of the antenna will determine the range from which you are able to access and remote control the antenna.

- Add a Remote Control to the grid. The arrows on the top and bottom indicate what direction “forward” will be while the remote control is active.

- Now, simply look for the grid name in the remote menu.

Speed limits: Speed limits are set to 10 m/s by default. While faster speeds may be preferred in specific situations it’s important to consider a few things.
- A large, heavy grid, with few thrusters, will stop more slowly than a small light grid with many thrusters. This may seem obvious, but, we have seen more than a few flying miners that can no longer move once fully loaded with ore.
- Precision mode – At very high speeds some ships may find it hard or even impossible to stop precisely with precision mode enabled. They may circle the point or behave erratically. We recommend you decrease the ship’s top speed if the precision mode is required.
- More thrusters will result in a faster stopping time and shorter stopping distance.
- More gyros will result in a faster turning speed, which can help a fast ship evade obstacles.
Pro Tip: A second flight block can be used to rapidly change speed or flight settings based on conditions. For instance, a drone could be set up to change to a faster speed for long-distance travel and slower speeds when in the proximity of a station or other ships.

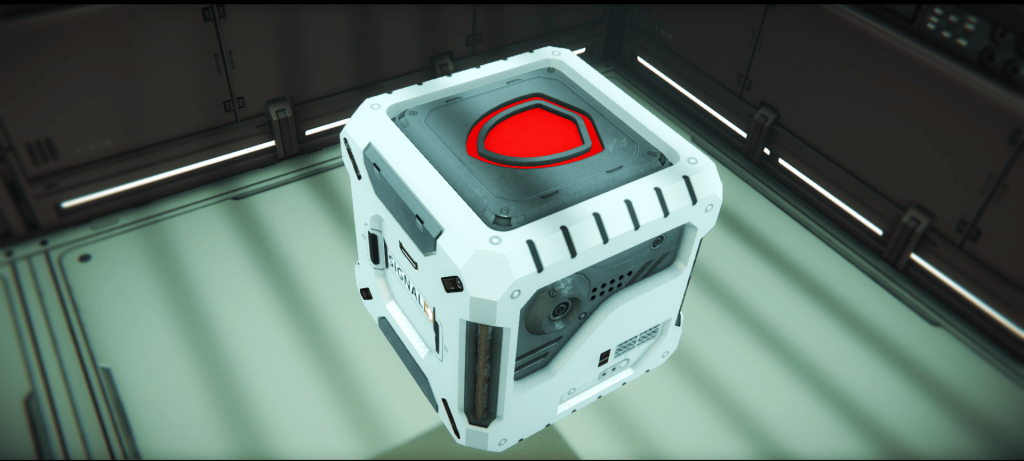
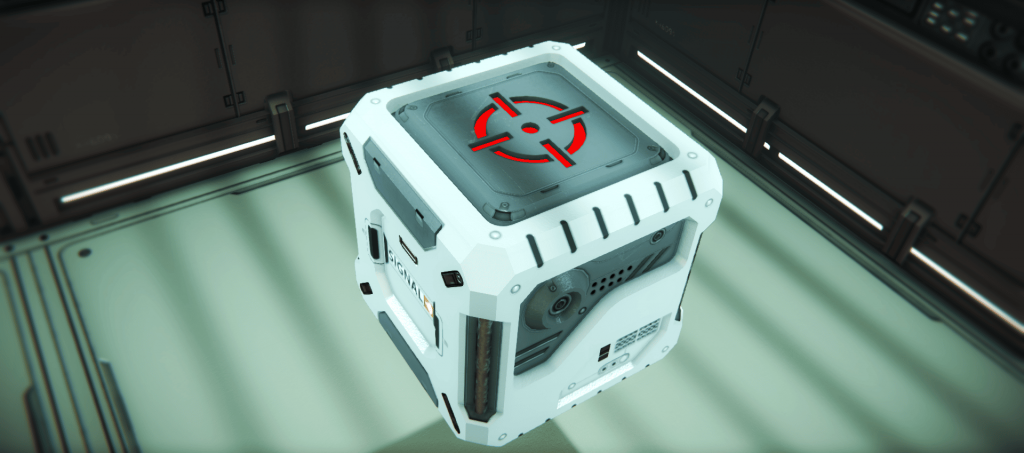
Indicator Color
- Red – This block is unpowered or turned off.
- Black – This block is damaged and disabled.
- Green – This block is on but the AI is not active.
- Blue – This block is on and the AI is active.
- Yellow – This block is on but the block detects errors

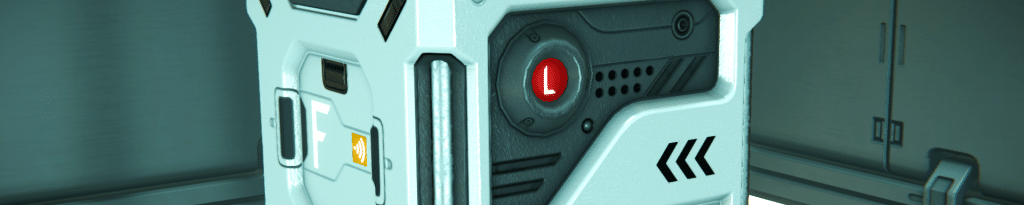
Orientation: Not all AI blocks provide orientation indicators. Those that do will display a number of text markers for orientation. The letters “L” & “R” indicate left and right, “Front” indicates the front or forward facing of the block, while “Rear Panel” is the rear or back of the block.
Not all AI blocks have orientation markings. For these blocks, orientation is not important and the block can be oriented however you like.
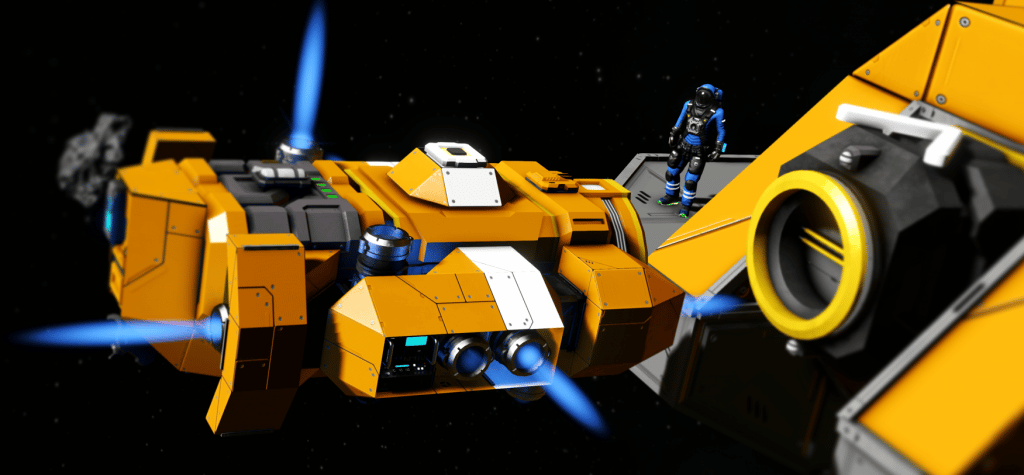
Mule
The Mule drone is a very simple drone design whose purpose is to follow the player and assist them by carrying components and ore.
Requirements:
(1) AI Flight (Move)
- Set a speed limit that suits your needs. A lower speed is safer especially when traveling close to grids and voxels.
- Turn off collision avoidance if you want this drone to follow you near asteroids and grids.
(1) AI Basic (Task)
- You can set up one or two buttons on the drone for quick & easy access to the “follow me” and “stop following” functions of the AI Basic (Task) block.
This drone is designed to activate by pressing the button on top. Once pressed the drone automatically follows you.
Mule Blueprint
Security Drone
Based on the “Mule”, the Security drone is a simple defensive drone design that patrols a designated location, and attacks enemies by chasing after them.
Requirements:
(1) AI Flight (Move)
- Keep collision avoidance enabled so it won’t fly into objects while patrolling.
(1) AI Basic (Task)
- Use the “follow home” Objective to ensure the drone stays near the designated GPS or beacon.
- Either use “Set current position” to have it patrol its current position, or select a beacon.
- “Wander while idle” should be enabled to allow the drone to patrol inside this designated area.
(1) AI Offensive (Combat)
- Use the “Circle/Orbit” attack pattern to make the drone fight a target using its static weaponry.
- Select what weapons it is allowed to use.
- Make sure the “Circle Distance” slider is set within the range limits of this drone’s weapons.
To activate this drone, Make sure all 3 AI behaviors are enabled and the patrolling area is properly designated.
The drone will patrol within its designated area and attack enemies on sight.
Alternatively, you could also use the “follow player” behavior instead to have it follow and protect you.
Security Drone Blueprint
Courier Drone
Based on the Mule drone design, the courier drone is an advanced drone that moves cargo from one location to another. It requires the use of Event Controllers and adapts its behavior using sensors in order to fulfill its task autonomously.
Requirements:
(1) Antenna + Remote control block
- The remote control block and antenna are necessary in order to take manual control over the drone for path recording. You could use a control seat instead and remove all of the above when you no longer need it.
- While recording a path on the path recorder, you need to set up the following actions on the remote control toolbar:
- Record on/off to activate the recording of the path recorder
- Connector on/off in order to record the connect action while recording.
You will typically get more accurate results if you use this toolbar action during a recording.
(1) AI Flight (Move)
- Initially, the “Precision Mode” should be enabled to make sure the drone can accurately connect to its target.
- Initially, Keep collision avoidance disabled. This can potentially conflict with its recorded path and cause the drone to avoid the waypoints close to a grid.
- For reliable results, keep the speed limit low during docking and departing sequences.
(1) Connector
- Without the connector, the drone can not connect to the target station and perform its task.
(2) AI Recorder (Task)
- One path recorder is required for each connector the drone should travel between.
- Each path recorder only has two waypoints recorded.
- A docking waypoint, in which the connection is automatically recorded,
- An approach path waypoint to ensure the drone approaches at the right angle. This waypoint also disables collision avoidance, allowing the drone to proceed closer to a grid to dock.
(1) Event Controller
- The event controllers detect when the cargo container(s) are empty. Upon detecting these states, they perform the following actions on the toolbar.
- Disconnect the connector.
- Turn on collision avoidance to have it avoid the station during transit.
- Turn off precision mode to make the drone fly faster.
- Enable the path-appropriate recorder behavior.
(1) Sensor
- When detecting a station in front or around the drone, the sensor enables precision mode so it will slow down in proximity of the station and can accurately dock and disembark.
- When it no longer detects the station, the sensor disables precision mode so the drone will have an easier time flying to its next destination.
Courier Drone Blueprint
A Better Airlock
Have you ever built an airlock?
From simplistic O2 wasting builds to the highly complex Oxygen conserving multi-part airlock, many variations exist and they can get very complex, very quickly. Our very own Aragath has designed a new iteration of the classic airlock using the Event Controller. Better airlocks, easier than ever!
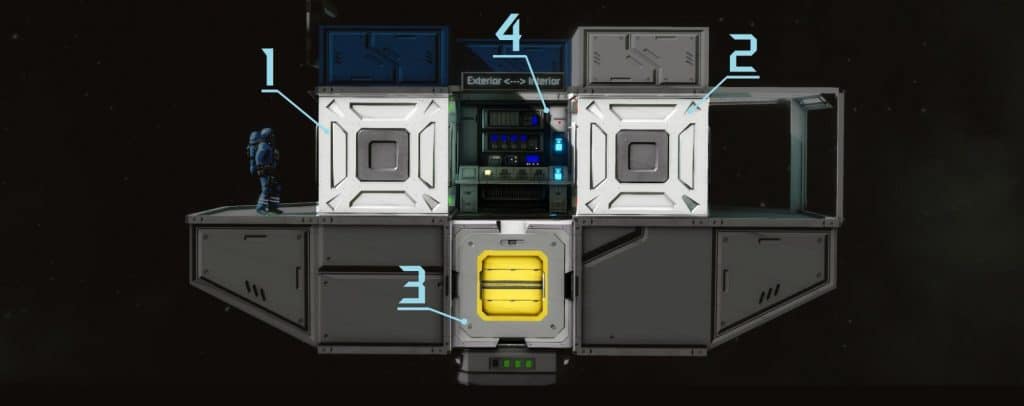
- Exterior Door
- Open this door.
- Interior Door
- Close this door and turn it off.
- Air vent
- Set to depressurize.
- Set the Air Vent’s first action slot to trigger the “Open Door” action on the Interior Door.
- Set the Air Vent’s second action slot to trigger the “Open Door” action on the Exterior Door.
- Event Controller
- First toolbar, Second action slot: On/Off Exterior Door
- Second Toolbar, Second action slot: On/Off Interior Door
- Third Toolbar, Second action slot: On/Off Depressurize
To operate the airlock, close the door that is opened. This will activate the airlock. The air vent will depressurize or pressurize and open the opposite door once it is done.
Operation – Remember that there has to be room left in the oxygen tank in order to transfer the oxygen from the room into the tank while depressurizing.
Operation – If the room fails to pressurize or depressurize due to lack of oxygen or other reasons, no worries! The doors are unlocked and you can still open them manually.
A Better Airlock Blueprint
Powered by your "Need to Create"
Become a Space Engineer today!
Start Creating